Showing posts with label good stuff. Show all posts

Friday, December 25, 2015

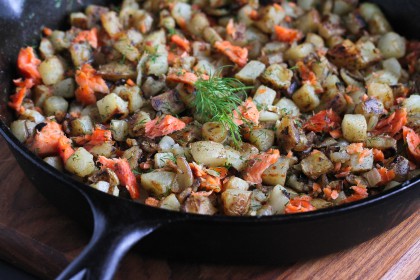
Foodie Friday- Merry Christmas Breakfast edition- Smoked Salmon & Dill Hash


It might be too late to whip up this
tasty dish from Pioneer Woman & Friends today, but it would make a fabulous addition to your New Year's breakfast/brunch if you do that kind of thing! Or just make it whenever you feel like it- it's go no matter when you eat it. In fact, I made it as a dinner the other night.


Smoked Salmon & Dill Breakfast Hash

Prep: 15 Minutes Level: Easy
Cook: 20 Minutes Serves: 4
Ingredients

1 Tablespoon Vinegar
2 pounds Russet Potatoes, Cut Into 1/2-inch Dice
3 Tablespoons Plus 2 Teaspoons Olive Oil, Divided
1 Yellow Onion, Chopped
2 cloves Garlic, Minced
1/2 teaspoon Salt
1/2 teaspoon Ground Pepper
4 ounces, weight Smoked Salmon, Broken Into Pieces (lox is ok, but hot smoked salmon is much better for this)
2 Tablespoons Minced Fresh Dill
Preparation

Bring a large saucepan of lightly salted water to a boil over high heat. Stir in the vinegar. Add the russet potatoes and cook until just tender, 8–10 minutes. Drain.

Heat 2 teaspoons of olive oil in a large skillet (preferably cast-iron) over medium heat. Add the onions and cook, stirring occasionally, until the onions are starting to brown. Stir in the garlic and cook for 30 seconds. Transfer the onion mixture to a bowl and set aside.

Turn the heat to medium-high, add remaining 3 tablespoons of olive oil to the skillet and stir in the drained potatoes. Cook, stirring occasionally, until the potatoes are browned and cooked through, 15–20 minutes. Season with salt and pepper.

If the potatoes start to burn while cooking, turn the heat to medium. Stir the cooked onions into the potatoes, and add the smoked salmon and dill.

Stir to combine. Serve.

Thursday, November 26, 2015

Thanksgiving, hell! It's Cake Day!


Ok, fine. Here's a Thanksgiving dinner, which I might add looks NOTHING like anything my family puts together. We don't have the patience to make it pretty- we just want to EAT!


Now for the good stuff!


Carrot Cake


Chocolate Cake (my favorite)


Spice Cake, with a cream cheese icing


Apple Walnut Cake- my version is made with a cream cheese glaze, but this one looks pretty good!

Sunday, October 18, 2015

Foodie Weekend Bonus Recipes- Soup Edition (Chicken & Gnocchi, Salmon-Corn Chowder)


It got down to 34 here yesterday morning. It was 80 two weeks ago and now we have this crap. Everybody is sick and cranky, especially me. I wanted something good the other day, and couldn't decide what. Soup sounded good, so I made myself get up and throw some together. (Sorry, canned soups just have too much sodium for my taste these days) I couldn't decide which of my favorites I wanted, so I made these two and now I don't have to cook for a day or two...unless I get hungrier for something more substantial! I may have posted these in the earlier days of the blog- I was too tired/lazy to go back and check.

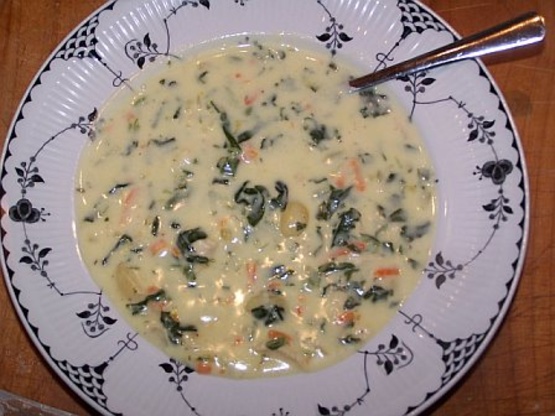
First up is this gem. It's the Homemade version of Olive Garden's Chicken & Gnocchi Soup.


INGREDIENTS


3 -4 chicken breasts, cooked and diced
4 cups chicken stock
2 cups half-and-half
1 stalk celery, diced
1 garlic clove, chopped
1⁄2carrot, shredded
1⁄2onion, diced
1 cup fresh spinach, chopped
1 tablespoon olive oil
1 teaspoon thyme
salt and pepper
16 ounces potato gnocchi
1 tablespoon cornstarch (optional)

DIRECTIONS

Saute the onion, celery, garlic, carrot in oil over medium heat until onion is translucent.
Add chicken, chicken stock, half and half, salt and pepper, thyme. Heat to boiling, then add gnocchi. Gently boil for 4 minutes, then turn down to a simmer for 10 minutes.
Add spinach and cook for another 1-2 minutes until spinach is wilted.
(Heat to boiling and add cornstarch dissolved in 1-2 Tbsp water at this point if you want a thicker soup.).
Ladle into bowls and serve!


SERVINGS 8-10

I used mini-gnocchi this time, but any version will work.


The other one that sounded good to me was my version of Whole Foods Salmon Corn Chowder. I had bought a chunk of smoked salmon of Friday, thinking I would take it to work for snacking on with cheese and crackers. Most of it went into the soup instead, but there's enough left for a good snack. This is a fast & dirty cheat recipe, based on cans (I know what I said above, but work with me) and a few fresh ingredients.

This picture isn't my recipe, but it's close enough. I forgot to take a picture, so this will have to do:

2-4 oz hot-smoked salmon, flaked or cut into smallish chunks (not the bright pink lox you would serve on bagels, the other kind)
1 can creamed corn
1 can cream of potato soup
1/4-1/2 small onion or 1 lg shallot, finely chopped
1 clove of garlic, minced
1/2-1 carrot, shredded
1/2-1 rib celery, finely chopped
1-2 tbsp olive oil
1 tsp dill

Heat the olive oil in a large saucepan. Add the fresh veggies and cook over medium heat, stirring constantly, until they are soft but not quite browned. Stir in the soup & creamed corn, allow to come to a simmer. Stir in the salmon & dill, allow to simmer for 15-30 minutes, depending on how hungry you are. If you prefer a thinner soup, you may wish to add a splash of milk or 1/2 & half just prior to serving. If you like it thicker, a bit of cornstarch dissolved in some milk and added to the pan will help.

2-4 servings depending on how hungry you are and what size bowl you use.


Both of these are good with crusty bread, plain or buttered.

Monday, August 31, 2015

What I did on my vacation

As usual, finances & health issues conspired against me for my vacation this year. At least I got to spend 2 weeks away from the snake pit office!

I spent a lot of my time sleeping, reading, and binge watching Luther using my mother's OnDemand service. If you haven't seen Luther, you really should. It's a great British detective series, starring the devilishly sexy Idris Elba, and it is twisted and wonderful.


The last weekend, I decided to go up to Cincinnati. My parents chose to join me. Amazingly, it wasn't our usual road-trip disaster! First stop was IKEA. I've been wanting to go for years, and now I can cross that off my Bucket List. It wasn't all it was cracked up to be. The place is huge, and we walked our feet off. Well, Mom & I did. Dad opted for a wheelchair. (He's getting increasingly frail and it breaks my heart) The furniture is all neat looking, and I picked up a small end table kit for $8. Hey, it was all I could afford, and besides, we didn't have room in the car for a whole lot of stuff! We ate lunch in their cafeteria. THAT was good. Mom had their specialty- Swedish meatballs with potatoes and lingonberry sauce. Daddy had a plate of ribs that he'd devoured and sucked the bones clean before I could get a picture of them, and I had the salmon you see pictured below. It came with a delicious lemon-dill sauce, 2 spinach-potato cakes, and a piece of garlic bread. I also tried their chocolate cake, which was to die for! Mom was kind enough to let me include her lingonberry drink and the candy bar she bought in the picture of my lunch.

Besides the table, which I have yet to assemble & photograph, I picked up some things in the housewares section as you see. The cross stitched looking thing is a cushion cover. (need to buy a cushion to fill it) The striped package is a new shower curtain. Being a candle junkie, I couldn't resist the tea light lantern. Then there's cookies (raspberry & chocolate filled), a can of sparkling apple cider, and a tea infuser that Mom bought for me. And one ginormous shopping bag!


I had hoped to get to Keepsakes, the cross stitch shop, while we were up there, but it didn't happen, yet again. They close at 4. We left IKEA at 3:30. So we went to Jungle Jim's instead!

Daddy was thrilled- They have the motorized scooters for disabled shoppers, so he got to do his best Mario Andretti performance and took off. Mom stuck with me for a while before wandering off on her own, and I was left to shop in peace. Sort of. You know my thing about hating crowds? Kicked in big time. Every aisle I tried to browse suddenly filled up as soon as I got to it. I finally got to my Grail- the British food section!- only to find it half empty of product and completely filled with rabid assholes. The MAIN thing I wanted was dark chocolate covered Hobnobs, and they didn't have them. (Going to have to hit up some of my British penpals for those! Bexy owes me for the Oreos I sent her. *grin* )

Anyway, I picked up some odds & ends throughout the store, and we got checked out and made the drive home with very little trouble. The 3 best things I bought were an eclair from the bakery, 4 garlic dill pickles from the deli (HUGE!), and a can of Tiki Cat Ahi Tuna & Mackerel for Nightshade. The way she wolfed it down and licked her bowl clean tells me that I need to try to find that somewhere around here or online for her!

Sunday, August 30, 2015

Happy Bacon Day!


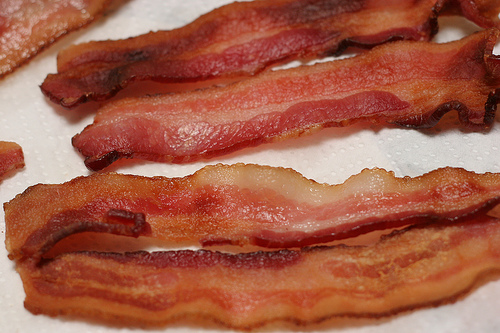
Bacon. Bacon. BACON. Quite possibly the best meat on the planet. I love the stuff. How can you go wrong with a day of Bacon celebration?


For more info on this, go here.


And for a delicious and unusual treat, try THIS!


For those that REALLY love their bacon, there's this:

My new motto is


And now, if you'll excuse me, I'm a little hungry for some reason...


Friday, August 14, 2015

Happy Birthday to Me! Oh, yeah, and it's Foodie Friday!


Those who know me know that I *despise* crowds, and consequently go to very few of the fairs and festivals around the way. The one thing I miss about going to them is the food. Ohhhh, the food. Especially funnel cakes! I don't need the mountain of toppings that I've seen people put on them- just give me mine straight out of the fryer and coated with powdered sugar! We had a movie theater that used to sell them (before I quit going to movies because of the crowd thing), but I hear that they no longer have them either.

Then I came across this little gem. *happydancing* I'm making myself a batch for a treat. Here's hoping I don't eat the whole batch at once!

Ridiculously Easy Funnel Cakes
Adapted from Serious Eats


Makes 6 to 8 6-inch (or so) cakes

The original recipe amounts (which I’m posting here) call for 2 quarts of oil and frying the cakes in a Dutch oven. I suppose the deeper the oil level and more room in the pot to work with, the better, but I used my beloved, heavy medium-sized saucepan that’s about 7 1/2 inches in diameter and poured in oil just to a depth of about 1 inch, which probably amounted to a couple of cups, and things worked out fine.

To make this project as easy and fun as it should be, have everything ready before you begin frying. I highly recommend a plastic squeeze bottle for getting the batter into the oil–that’s the fun part, making all those loops!–and a slotted spoon and a thin vented spatula like a fish spatula for flipping and transferring the cakes with ease. And please, please save yourself the headache and use a candy or deep fry thermometer so that you know you oil gets to and stays at the right temperature while you’re frying.


These are are best eaten hot, so have your funnel cake crowd ready and waiting for their cakes as they come out of the fryer!

2 quarts canola oil for frying (or less–see note)
1 1/2 cups “complete” buttermilk pancake mix
1/2 cup water (I needed a bit more to get my batter to the consistency of cake batter)
2 tablespoons sugar
2 teaspoons pure vanilla extract
Confectioners’ sugar, for dusting

Line a large baking sheet with a double layer of paper towels. In a large, heavy-bottomed pot, such as a Dutch oven, heat about an inch of the oil to 375 degrees.

Meanwhile, in a medium bowl, whisk together the pancake mix, water, sugar, and vanilla extract until very smooth–you’re looking for a batter about the consistency of cake batter, and it should fall back into the bowl in a ribbon when you lift the whisk. Transfer the batter to a squeeze bottle with a 1/4-inch opening (or to be really traditional, pour the batter through a small funnel into the oil).

When the oil is up to temperature, holding the bottle about 5 to 6 inches above the surface of the oil, squeeze the batter into the pot, quickly working in a circular motion about 4 to 6 inches in diameter to form loops and swirls. Cook the cake for about 1 minute, or until an even golden brown on the bottom, before flipping it and cooking and additional 30 seconds on the other side. Remove the cake to the paper toweling to drain for a minute before dusting with confectioners’ sugar. Repeat with the remaining batter.

Friday, August 7, 2015

Foodie Friday- Bacon, Beef and Mushroom Ragu with Macaroni


This is another Rachael Ray dinner. I kind of hate watching her shows, as I've mentioned before, but I do like a lot of her dishes.


Ingredients

2 tablespoons extra virgin olive oil (EVOO)
1/4 pound lean bacon or pancetta, chopped
1/4 pound crimini mushrooms, chopped
2 tablespoons fresh thyme, chopped
1 bay leaf
1 pound ground beef
1 medium onion, minced
2-3 large clove garlic, minced
Salt and pepper
3 tablespoons tomato paste
2 cups veal stock or beef stock
1 pound long, Italian-style ridged macaroni (called maccheroni rigati or ziti rigate)
2 tablespoons butter
Freshly grated Grana Padano cheese


Preparation

Bring a large pot of water to a boil.

In a deep skillet or large saucepan, heat the EVOO over medium-high. Add the bacon and cook until the fat melts, 2-3 minutes. Add the mushrooms, thyme and bay leaf. Cook until the mushrooms brown, 3-4 minutes. Add the ground beef and cook, breaking up into small pieces with a spoon, until browned, 4-5 minutes. Add the onion and garlic; season with salt and pepper.

Partially cover the skillet and cook, stirring occasionally, until the onion softens, 5-6 minutes. Add the tomato paste and stir until fragrant, about 1 minute. Stir in the stock, then reduce the heat to low and let the ragu simmer while the pasta cooks.

Salt the water and cook the pasta until al dente. Drain, reserving 1/2 cup of the starchy cooking water. Add the pasta and the cooking water back to the hot pot. Toss with half the ragu and the butter; season. Serve the pasta in shallow bowls topped with the remaining sauce and cheese.


You can use just about any pasta you want with this. I tend to use farfalle/butterfly or shells because I just like them. Parmesan & Asiago cheeses also work well for this.

Thursday, July 30, 2015

Happy National Cheesecake Day!


In honor of the "holiday", here is a bonus recipe for the week!


Cheesecake Egg Rolls


Ingredients

12 egg roll wrappers
2 blocks (8 oz each) cream cheese, softened
1 cup sugar
1 tsp vanilla extract
1/4 cup granulated sugar
1/4 tsp ground cinnamon
Nonstick baking spray

Instructions

Preheat oven to 425. Spray a large baking sheet with nonstick spray and set aside.
In the bowl of your mixer, combine cream cheese, sugar, and vanilla.
Wet the edges of an egg roll wrapper with water. Spread cream cheese mixture in the middle and fold according to egg roll wrapper directions.
FOLD AS TIGHTLY AS YOU CAN -- SEALING THE EDGES.
Place egg roll on prepared baking sheet. Spray with nonstick spray and sprinkle with cinnamon sugar.
Bake for about 10 minutes or until dark golden brown. Remove from oven and let cool slightly before serving.

Excellent with chocolate or caramel sauce for dipping!

Friday, June 26, 2015

Foodie Friday- Dog friendly edition


I realized that it's only fair to make goodies for our beloved animal companions from time to time. So, after searching for recipes, I found this one and tried it on my friend's finicky cocker spaniels and one of our less than picky K9 units at work. It was a kit with both of them. This is also safe for humans- my friends and I all tried it, but didn't like it nearly as much as all of the pups did!


Homemade Chicken Jerky For Dogs

INGREDIENTS

1 pound boneless skinless chicken breasts
1 tablespoon smooth peanut butter
1/4 teaspoon soy sauce

PREPARATION

1. Preheat your oven to 170˚ F.

2. Remove any excess fat or bits of bone from the chicken breasts and pat dry.

3. Mix together the peanut butter and soy sauce, which creates the marinade for the jerky. Stir and thin with up to 1 tablespoon of additional water to create a smooth paste. Coat the chicken with the peanut butter mixture, and place in the freezer for 1 hour.(Slightly freezing the chicken makes it easier to thinly slice.)

4. Remove the chicken from the freezer, and cut as thinly as possible.

5. Cover a sheet tray with parchment paper, and arrange the thin slices in a single layer. Place in the oven, set the timer for 2 hours, and hang out with your pup while the jerky cooks.

6. Your jerky is ready! Once cool, cut with scissors into smaller bits, or leave as is for big mouthfuls of chewiness. Store in a sealable container, and your homemade chicken jerky is good for up to 30 days — if it lasts that long. And the jerky is totally human-tasty, too. It's low in fat and sodium while being a high-in-protein pick-me-up.

Chicken is a healthy protein for pups and gives the jerky a nice chew without being too dry. For chewier jerky, cut the chicken with the grain.

Friday, June 19, 2015

Foodie Friday- This One's Dedicated to All the Kitties!


This is for the cats. It's a little time consuming to make, but any cat will tell you that they're worth the extra trouble.

Homemade Organic Spinach and Chicken Cat Treats

INGREDIENTS

1/2 pound steamed organic boneless and skinless chicken thighs
1 cup fresh organic spinach leaves
1 cup organic quick-cooking oats
1 organic brown egg
1 tablespoon organic catnip
1/4 cup flour

PREPARATION

1. Preheat your oven to 350˚F. Steam the boneless and skinless chicken thighs until cooked through. You can swap for boneless and skinless organic chicken breasts, salmon, or tuna with cat-loving results too. Let the chicken cool for 20 minutes before the next step.

2. Place the chicken, oats, spinach leaves, egg, and catnip in a blender or food processor, and pulse on low until the mixture blends together. It should still be a bit chunky but also smooth, similar to the texture of wet sand.

3. Pop the mixture into a bowl and add the flour. You can also add a dash of salt or sugar to mix up the flavor. Use your hands to knead the dough until it's no longer sticky, then place on a flour-dusted work surface.

4. Use a rolling pin to create a rectangle of dough around 1/2 inch thick. With the help of a pizza cutter or small cookie cutter, create small shapes for the finished treats.

5. Place the kitty treats on a parchment-lined sheet tray, and bake for 20 minutes. Remove from the oven, cool until room temperature, and then toss to your cat.

TIP
If your cat isn't a fan of chicken, then swap with organic salmon or tuna.


My notes-
This is probably the only thing I will ever use chicken thighs for. I got lucky and scored free ones when I explained to the meat counter guy at Whole Food$ what I needed them for. He asked me to let him know how they came out because he has a cat of his own. (I took some of the treats and a copy of the recipe back to him for his cat) I might try them with breast meat just to see how it comes out and because I usually have that on hand. Also, if you're worried about the cost of organic foods, you can do this with conventional items. I doubt the cat/s will notice the difference.

Nightshade loved these, BTW. So did the feral cat colony. I'm not sure how long they're supposed to last, but I'd think they're ok for a week or two as long as you store them in a tightly sealed container.

Friday, June 5, 2015

Foodie Friday Bonus! Happy National Doughnut Day!


National Doughnut Day is on Friday, June 5 and Dunkin' Donuts wants you to have FREE DOUGHNUTS to celebrate.

The offer applies to participating Dunkin' Donuts locations across the nation, the company said in a press release. Even better, lucky patrons will be able to pick out the free doughnut of their choosing -- about 70 options -- instead of being confined to limited options. Dunkin' cites Boston kreme, glazed, chocolate glazed cake and chocolate frosted as the most "beloved" varieties.

I'm so glad I found this! Guess where I'm stopping on my way home from work? LOL. There are advantages to working on the late shift now...

Foodie Friday- Crockpot Sunday Sauce


I adore a good, meaty pasta sauce. This fits the bill quite nicely!

Crockpot Sunday Sauce.

*If you do not have time, you can skip browning the short ribs and just add the ribs right to the crockpot completely raw, but I find it is best to sear the ribs first for the most flavor.

**If you do not want to brown the butter on the stove, just add it directly to the crockpot

Ingredients

2 tablespoons olive oil
3-4 pounds bone in short ribs*
salt + pepper
6 tablespoon butter*
1/2 cup red wine
2 (28 ounce) cans whole, peeled, san marzano tomatoes, crushed with your hands
3/4 cup oil packed sun-dried tomatoes, drained of the oil
1 (6 ounce) can tomato paste
1 sweet onion, finely chopped
4 cloves garlic, skin removed and crushed
1 carrot, cut into large pieces
6-8 pickled jalapeños (optional, but it gives it just a a little kick)
2 teaspoons dried basil
2 teaspoons dried parsley
1 teaspoon oregano
1/2 teaspoon dried thyme
1/2 teaspoon crushed red pepper (more or less to you taste)
1/2 teaspoon pepper + salt
2-4 tablespoon fresh parmesan cheese + the parmesan rind (optional)
fresh basil, sliced, for serving
fresh hot past, for serving
Instructions

The night before or the morning of, heat a large heavy bottom skillet over medium high-heat and add the olive oil. Add the ribs to the skillet and sprinkle with salt + pepper. Sear the ribs on all sides for about 1 minute per side. Remove the ribs and place them in the crockpot bowl.

In a heavy-bottomed sauce pan, preferably lighter in color (to better observe the color of the butter so it doesn't burn) add the butter, melt butter over medium heat until just browned. Butter will melt, foam, and froth, then begin to brown along the bottom. Whisk browned bits off of the bottom of the pan and pour all the butter over the ribs.

To the crockpot, add the red wine, tomatoes, onions, garlic, carrot, jalapeños (if using), basil, parsley, oregano, thyme, crushed red pepper, salt and pepper. If you have a parmesan rind on hand, toss that in the crockpot as well. Cover the crockpot and cook on low for 7 to 8 hours (or 4-6 hours on high) stirring once or twice if possible. After 8 hours remove the short ribs, carrot and parmesan rind from the sauce, discard the carrot + rind and try to get all the short rib pieces out of the crockpot.

Shred the short ribs with your hands or two forks.

If you like a smooth sauce use an immersion blender to puree the sauce or transfer to a blender or food processor and then return the sauce to the crockpot. Stir the shredded short ribs, parmesan cheese and 2 tablespoons fresh basil. Taste and season with salt and pepper to your liking. If the sauce seems too thin allow it to cook with the lid off while you boil your pasta, if the sauce seems just right, keep it covered.

Bring a large pot of salted water to a boil. Boil the pasta until al dente. Drain the pasta well.

Serve the warm sauce over a hot a bed of pasta, on a sandwich or use in lasagnas, pasta dishes, or as a pizza topper

Friday, May 29, 2015

Foodie Friday- Tuscan Apple Cake


OMG, y'all, this is so GOOD!

Ingredients

1/2 cup unbleached all-purpose flour, plus more for the pan

2 teaspoons baking powder

pinch of sea salt

2 large eggs, at room temperature

1 cup sugar, preferably organic

1 teaspoon vanilla extract

1/2 cup milk

7 tablespoons unsalted butter, melted and cooled slightly, plus more at room temperature for the pan

4 large firm-fleshed apples (1 3/4 pounds), peeled, cored, quartered, and cut crosswise into 1/8-inch slices

Powdered sugar, for garnish


Directions

Preheat the oven to 375 degrees.

In a small bowl, combine the flour, baking powder, and salt. Set aside.

Place the eggs, sugar, and vanilla extract in the bowl of an electric mixer. Whisk on medium speed until the sugar has dissolved and the mixture is pale and thick, about 30-60 seconds.

Fold the flour into the egg mixture with a wooden spoon until just incorporated. Fold in the milk, then the butter and finally the apple slices. Be sure not to overmix.

Butter and flour a 10-inch nonstick springform pan. Pour the mixture into the prepared pan. Pack the apples into the mold and flatten the surface of the cake with the wooden spoon.

Bake for 10 minutes on the floor of the oven. Transfer the pan to the middle rack and continue baking until golden brown and a toothpick inserted into the center comes out clean, for 50-55 minutes.

Remove the cake from the oven, and run a paring knife around the edge to loosen the cake from the ring of the mold. Let cool in its mold to room temperature. Unmold the cake and transfer to a serving platter. Dust with powdered sugar and serve.

Notes

Note: The cake can be baked up to 6 hours ahead and kept in its mold at room temperature in a cool place. It is best eaten the day it is made.

Monday, May 11, 2015

It's National Eat What You Want Day!


Sorry, this is a bit late, but I just found out about it. I generally celebrate it every day, but it's nice to know there's an official designation. Here are some suggestions of yummy things to try if you need help.


Some of my favorite foods are:

Ribeye steak with mushrooms and onions.


Philly cheese steak- my favorite version is from the Philly Deli back home and comes with ham & mushrooms in addition to the cheese & onions


This is what the Formaggio Bene pizza from Incredible Gourmet Pizza in Wilmington looks like. White cheese, garlic, shredded basil, and a touch of olive oil. Bliss!


Nobody in my family can agree on the spelling or pronunciation of these (google spelled it fleischkuechle), but we all agree that they are one of the best things on Earth! How can you go wrong with what is basically a fried meat turnover?!?

Last, but not least, on my favorite foods for today:

Can I find this ANYWHERE in Kentucky?!? Hell no.

Friday, May 8, 2015

Foodie Friday: Sloppy Joe Stuffed Peppers


This is one of those things that just kind of jumped out at me when I was looking for a new dish to try. It's fairly easy and surprisingly good!

MOM'S SLOPPY JOE STUFFED PEPPERS

PREP TIME
5 mins
COOK TIME
30 mins
TOTAL TIME
35 mins

Author: Morgan

Serves: 6

INGREDIENTS

3 bell peppers (I prefer red, orange, and yellow)
1 lb lean ground turkey
1 can Sloppy Joe sauce (we use Hunt's Manwich)
1 tablespoon canola oil
Salt and pepper, to taste
6 slices colby jack or cheddar cheese
Parsley or green onion, chopped, to garnish (optional)
Brown rice, cooked, to serve (optional)

DIRECTIONS

Using a paring knife or other small knife, cut around the stem to remove it from the pepper and discard.
Cut the pepper in half and cut out any leftover seeds or membrane.
Preheat the oven to 350 degrees F.
In a large, heavy bottomed skillet over medium-high heat, add a drizzle of canola oil. Once the oil is hot, add in the ground turkey, breaking it apart as it browns.
Once the turkey browns, drain off any excess liquid. Add in the Sloppy Joe sauce, cook for 2 minutes, and then cover and reduce heat to low.
Spray a large, oven-safe dish with nonstick cooking spray and place in the peppers, cut side up. Bake for 10-15 minutes, or until slightly softened.
Divide the Sloppy Joe turkey meat evenly among the pepper halves. Bake again for 15 minutes.
Top each pepper half with a slice of cheese and bake one last time, for 5 minutes or until the cheese has completely melted.
Garnish with parsley or green onion, if you'd like, and serve with brown rice.


Of course those who know me, know I hate brown rice, so this gets served with white rice. Cornbread is also a good side for this.

Friday, May 1, 2015

Foodie Friday- Tunnel of Fudge Cake

I *LOVE* a good chocolate cake and this is one of my favorites!

Quick Tunnel of Fudge Cake
Source: Chocolate from the Cake Mix Doctor by Anne Byrn
Servings: 16

FILLING
1 1/2 cups milk
1 pkg.(3.4 oz) chocolate fudge pudding and pie filling mix (not instant)
1 cup semisweet chocolate chips
1 Tbsp. butter

CAKE
vegetable oil spray for misting the pan
flour for dusting the pan
1 pkg (18.25 oz.) devil's food cake mix with pudding
1/2 cup vegetable oil
1/2 cup sour cream
1/2 cup water
4 large eggs
1 tsp. pure vanilla extract
2 cups finely chopped walnuts

Place the milk in a medium size saucepan and whisk in the pudding mix. Cook, stirring, over medium heat until the mixture comes to a boil, 4-5 minutes. Remove the pan from the heat and stir in the chocolate chips and butter. Stir until the pudding is smooth and thickened and the chocolate has melted. Set the pan aside.

Place a rack in the center of the oven and preheat the oven to 350 deg. F. Lightly mist a 12 cup Bundt pan with vegetable oil spray, then dust with flour. Shake out the excess flour. Set the pan aside.

Place the cake mix, oil, sour cream, water, eggs, and vanilla in a large mixing bowl. Blend with an electric mixer on low speed for 1 minute. Stop the machine and scrape down the sides of the bowl with a rubber spatula. Increase the mixer speed to medium and beat 2 min. more, scraping the sides down again if needed. The batter should look thick and well combined. Fold in the walnuts, making sure they are well distributed throughout the batter.

Reserve 2 cups of the batter. Pour the remaining batter into the prepared pan. Spoon the pudding filling in a ring on top of the batter, making sure it does not touch the sides of the pan. Spoon the reserved batter over the filling, smoothing it out with the rubber spatula. Place the pan in the oven.

Bake the cake until it springs back when lightly pressed with your finger and is just starting to pull away from the sides of the pan, 45 to 50 minutes. Remove the pan from the oven and place it on a wire rack to cool for 20 minutes. Run a long, sharp knife around the edge of the cake and invert it onto a rack to cool completely, 20 minutes more.

Meanwhile, prepare chocolate icing.

Place the cake on a serving platter and pour the warm icing over it. Let the cake rest for 10 minutes before slicing.

Slice and serve.

* Store this cake, wrapped in aluminum foil or plastic wrap, or in a cake saver, at room temperature for up to 1 week. Or freeze it, wrapped in foil, for up to 6 months. Thaw the cake overnight in the refrigerator before serving.

Her note: This cake contains a lot of walnuts simply because that's how Ella Rita Helfrich created it. If you want to cut back to 1-1/2 cups, that's fine. Just make sure the nuts are finely chopped so they don't interfere with the crumb of the cake. You can do this easily in a food processor or with a good sharp knife and a cutting board.

Pour your favorite chocolate glaze over the cake, or Martha's Chocolate Icing as I recommend here. Or just dust it with some confectioners' sugar and leave it as is. With the pudding inside, this cake needs little adornment. Note that I call for regular pudding mix here; not the instant kind."

MARTHA'S CHOCOLATE ICING
1 cup granulated sugar
5 Tbsp. butter
1/3 cup whole milk
1 cup semisweet chocolate chips

Place the sugar, butter, and milk in a medium-size saucepan over medium-high heat. Stir until the mixture comes to a boil, 3-4 min. Still stirring, let the mixture boil until the sugar dissolves, 1 minute. Remove the pan from the heat.

Stir in the chocolate chips, and continue to stir until the mixture is smooth and the chocolate has melted.

Spread the icing over the cooled cake or cupcakes of your choice.


My notes: I usually leave the nuts out altogether. I like them, but prefer the pure chocolate. I also usually skip the icing and use just a bit of powdered sugar over a slice or eat it plain.

Friday, April 17, 2015

Foodie Friday: Angelica's Carrot Cake

I love a good mystery novel. Thrillers, police procedurals, cozy mysteries, I love them all. Lorna Barrett's Booktown series combines bookstore & foodie happenings into one fun series AND she shares recipes like this one!

Angelica’s Carrot Cake

6 cups grated carrots
1 cup brown sugar
1 cup raisins
4 eggs
1 ½ cups granulated sugar
1 cup vegetable oil
2 teaspoons vanilla extract
1 cup crushed pineapple, drained
3 cups all-purpose flour
1 ½ teaspoons baking soda
1 teaspoon salt
4 teaspoons ground cinnamon
1 cup chopped walnuts

In a medium bowl, combine grated carrots and brown sugar. Set aside for 60 minutes, then stir in the raisins.

Preheat oven to 350°F. Grease and flour two 10 inch cake pans.

In a large bowl, beat eggs until light. Gradually beat in the white sugar, oil and vanilla. Stir in the pineapple. Combine the flour, baking soda, salt and cinnamon, stir into the wet mixture until absorbed. Finally stir in the carrot mixture and the walnuts. Pour evenly into the prepared pans.

Bake for 45 to 50 minutes in the preheated oven until the cake tests done with a toothpick. Cool for 10 minutes before removing from the pan. When completely cooled, frost with maple butter cream frosting.

Maple Butter Cream Frosting

1 cup butter, softened
2 3/4 cups Confectioner’s sugar
2 tablespoons brown sugar
2 tablespoons maple syrup
¼ cup chopped walnuts

Place the softened butter in a large bowl. Beat with an electric mixer for 30-40 seconds until whipped. Scrape the sides of the bowl. Sift the confectioner’s sugar into the bowl. Beat with mixer for 30 to 40 seconds. Scrape down sides of bowl and add the brown sugar and maple syrup. Beat for 2 to 3 minutes or until the mixture is fluffy; scraping sides of bowl as needed. Stir in walnuts until just until mixed and spread on the cooled cake.


Friday, April 10, 2015

Foodie Friday for the Ambitious- Gordon Ramsay's Beef Wellington

Ready for an adventure? Try making this for your loved one/s.

INGREDIENTS

For mushroom duxelles:
1 pound cremini mushrooms, coarsely chopped
1 tablespoon extra-virgin olive oil
1/2 teaspoon salt
1/4 teaspoon black pepper

For herb crepe:
1/2 cup all-purpose flour
2 eggs
1 teaspoon sugar
1/2 teaspoon salt
2 tablespoons chives, minced
1/2 cup whole milk
1/4 cup water
4 tablespoons butter, melted, plus more if needed for pans

For beef Wellington:
2 pounds filet mignon
Salt and black pepper, to taste
2 tablespoons olive oil
1/4 cup whole-grain Dijon mustard
1/2 pound prosciutto di Parma
1 sheet puff pastry, thawed
1 egg yolk
1 tablespoon whole milk


DIRECTIONS


To make mushroom duxelles: Add mushrooms to a food processor and process until completely smooth. The consistency is similar to wet hummus.
In a pan over medium heat, add mushroom paste, olive oil, salt, and pepper. Spread the mixture evenly over the surface and cook on a medium-low heat until the moisture in the paste has reduced and the mixture has the consistency of a spreadable pâté. Remove from heat and let cool.

To make herb crepes: In a large bowl, whisk together flour, eggs, sugar, salt, and chives. Whisk in milk, water, and 1 tablespoon of melted butter, until smooth and emulsified.
Heat a crepe pan or large skillet over medium heat. Add remaining 3 tablespoons of butter. Add 1/4 cup of the batter. Rotate pan in a circular motion over the heat to completely cover the surface with the batter. The edges of the crepe will begin to curl slightly as the crepe cooks. Cook for approximately 45 to 60 seconds, then flip crepe to cook the other side. Each side should be a pale golden brown. Remove from heat. Add more butter if needed to the pan and repeat process with the remaining batter. Set crepes aside.
Preheat the oven to 400º F.

To make steaks: Pat filet mignon dry with paper towels and season generously with salt and black pepper. Heat a skillet over medium-high heat and add olive oil. When the oil begins to smoke, add the filet mignon and brown from 1 to 2 minutes on all sides. You want to create a nice sear on the outside of the steak but leave the inside raw. Remove from heat and place on a cutting board to cool.
Cover cooled filet with Dijon mustard.

To roll the beef Wellingtons: On a cutting board, lay out a long piece of plastic wrap. In the middle of the wrap, lay out a crepe. Spread mushroom duxelles over the crepe. Lay out the prosciutto on top of the duxelles. Place filet in the center of the crepe and gently wrap the crepe around the filet. Trim off any excess and use the plastic wrap to tightly wrap the steak.
Lay out a clean, long piece of plastic wrap. Gently roll out puff pastry until it is a 1/4-inch thin. Place the wrapped steak on one end of the puff pastry and wrap. Pinch the ends closed and trim off any excess puff pastry. Use the plastic wrap to tightly seal the puff pastry. Pop it in the fridge for about 5 minutes to let it firm up again.

In a bowl, mix together egg yolk and milk.

Place a sheet of parchment paper or aluminum foil on a baking sheet. Remove Wellington from fridge, remove the plastic wrap, and lay the Wellington seam-side down on the baking sheet. Baste the top of the puff pastry with the egg wash and bake for approximately 25 to 30 minutes or until the internal temperature of the steak reaches 125º F, or to whatever temperature you prefer your steak.
Remove from the oven and let rest for at least 10 minutes before slicing into medallions. Serve warm.


Notes
If, like me, you have family members who won't eat meat with any vestiges of pinkness, try cooking the steaks a little longer before cooling/wrapping them.

Don't do what one friend did and forget to remove the plastic wrap from the Wellingtons.

If you don't feel like faffing about with the crepes, you can skip them. Just carefully spread the duxelles on the the steak and make sure the pastry is tightly wrapped. It may be a little soggier since the crepe isn't there to absorb cooking juices, but will still be good.

Friday, March 20, 2015

Foodie Friday: Ree Drummond's Butterscotch Pudding


Ok, I'm back on a dessert kick. I think. We'll see what turns up on next week's installment, but in the meantime, here's today's deliciousness!

Butterscotch Pudding

Prep: 1 hr Level: Easy
Cook: 10 mins Serves: 6

Ingredients

1-½ cup Brown Sugar, Light Or Dark Is Fine
¼ cups Cornstarch
½ teaspoons Salt
3 cups Whole Milk
4 whole Large Egg Yolks (discard Or Save Whites For Another
Use)
2 Tablespoons Butter
Unsweetened Whipped Cream


Preparation


Gently whisk together the brown sugar, cornstarch, and salt in a medium
nonstick pan.
In a separate pitcher or bowl, whisk together the milk and egg yolks.
Pour it into the pan with the brown sugar mixture and stir to combine.
Turn on the heat to medium and cook, stirring gently, until the mixture
just starts to bubble up/get very thick. (This can take a good 10 minutes
or so.) When it reaches pudding consistency, stir in the butter until
melted, then remove it from the heat and spoon it into bowls, glasses (be
careful; mixture is hot), demitasse cups, etc. Chill the pudding for at least
1 hour or until very cold.
Top with unsweetened whipped cream and serve!


I love Pioneer Woman. I've tried several of her recipes and she hasn't let me down yet. I didn't think I even liked Butterscotch pudding until I saw this and something kept drawing me back to it. Serves 6 is optimistic, the way I serve dessert.

Friday, February 27, 2015

Foodie Friday- Nutella Cheesecake Bars

Yes, I'm still on a Nutella kick.THESE...all I can say is OMG, YUM!

INGREDIENTS

2 cups oreo crumbs
1/2 stick unsalted butter; melted
16 oz cream cheese; room temp
2 Eggs; room temp
1/2 cup sugar
1/4 cup heavy cream; + 1 tablespoon
1 teaspoon vanilla extract
1/3 cup nutella; (or another hazelnut spread)

PREPARATION

1.Preheat oven to 325 degrees F. Butter an 8×8 baking dish and line with parchment paper, making sure that the parchment is well pressed in the corners. Set aside.

2.In a food processor, pulse Oreos until they become crumbs. Add in melted butter and pulse until moistened. Press Oreo mixture evenly into the bottom of your baking dish. Bake crust until set, about 12 minutes. Set aside to cool.

3.Clean out the food processor. Add cream cheese, eggs, sugar, ¼ cup heavy cream, and vanilla. Pulse until smooth. Put 2/3 of the cream cheese mixture in a bowl and set aside.

4.Add Nutella and 1 tablespoon of heavy cream to the remaining 1/3 cream cheese mixture in the processor. Pulse until smooth.

5.To assemble, spread the plain cheesecake mixture over the cooled Oreo crust, being careful of the crust. Then pour the Nutella cheesecake layer on top of the plain cheesecake layer and spread evenly. Bake on the center rack of the oven for about 35 minutes, or until the center jiggles slightly. Remove from the oven and cool completely on a cooling rack. Refrigerate for at least 3 hours.

6.When ready to serve, lift the bars out of the pan by lifting up the parchment paper (it should release easily). Cut into 16 squares and serve.


Eat and die happy!